本文最后更新于 2025年2月7日 下午
编译安卓内核驱动,需要对应设备的内核源码,安卓手机的内核源码一般可以在github上面搜索到,如果机型较新,可能没有对应的内核源码,这个时候就只能等设备厂商开放了。github搜索关键词一般为android_kernel_<设备品牌>_<cpu代号或手机代号>。
下面的例子将使用oneplus 8 的内核源码进行驱动编译。
内核源码:https://github.com/ppajda/android_kernel_oneplus_sm8250
驱动源码: https://github.com/Poko-Apps/MemKernel
1. 克隆需要的代码
1
2
3
4
| # 克隆内核源码
git clone https://github.com/ppajda/android_kernel_oneplus_sm8250.git
# 克隆驱动源码
git clone https://github.com/Poko-Apps/MemKernel.git
|
2. 配置
配置驱动文件
1
2
3
4
| # 进入内核源码文件夹
cd android_kernel_oneplus_sm8250
# 这里使用 MemKernel 驱动的自动配置,如果是普通驱动,请参见后文
curl -LSs "https://raw.githubusercontent.com/Poko-Apps/MemKernel/main/kernel/setup.sh" | bash -s M
|
配置defconfig文件
1
2
3
4
5
6
| # 调用make distclean,清除原来的配置
make distclean
# 生成新的配置文件, xxx_defconfig 为你手机能编译通过的配置文件,一般位于 arch/arm64/config 中
make ARCH=arm64 xtd_defconfig
# 调整配置文件
make ARCH=arm64 menuconfig
|

开启内核的LKM支持

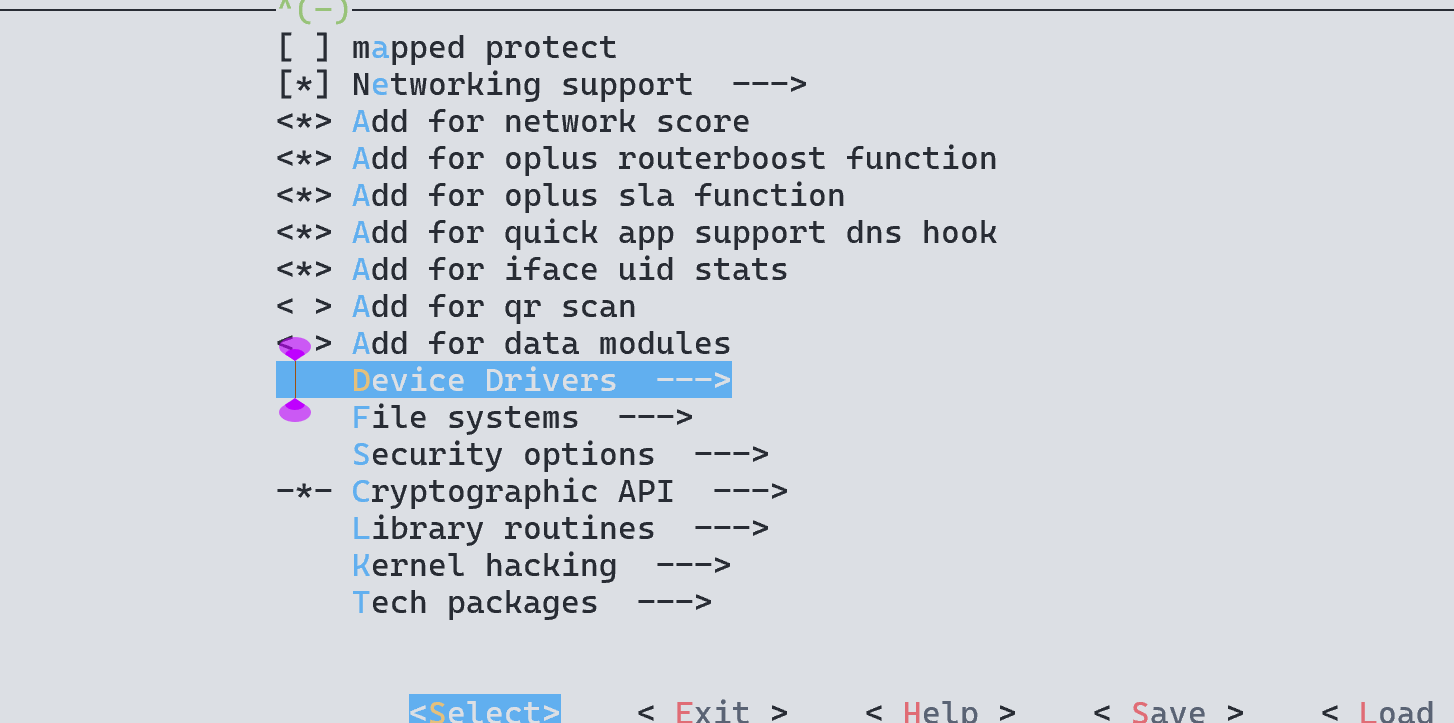
进入设备驱动目录

将添加的驱动改为M(按键盘的M键),然后保存配置
3. 编译
自制编译驱动脚本
1
2
3
4
5
6
7
8
9
10
11
12
13
14
| #!/bin/bash
# HOME path
export HOME=path/to/home
# Compiler environment
export CLANG_PATH=$HOME/clang/bin
export PATH="$CLANG_PATH:$PATH"
export CROSS_COMPILE=aarch64-linux-gnu-
export CROSS_COMPILE_ARM32=arm-linux-gnueabi-
make ARCH=arm64 CC=clang LD=ld.lld AR=llvm-ar NM=llvm-nm OBJCOPY=llvm-objcopy OBJDUMP=llvm-objdump STRIP=llvm-strip modules
|
在运行脚本时关闭LTO支持,很重要,不然会编译不成功

编译成功后就能在out/drivers/memkernel 中找到对应的 .ko 可挂载驱动文件了


